
Summary: A hydronic radiant floor heating system works best with proper planning and expert installation. This guide explains every stage, from home assessment and system design to pipe installation, testing, equipment setup, and final inspection. It also explains why professional installation improves comfort, heating performance, and long-term reliability while helping homeowners make informed decisions before starting their project.
A warm floor can make a home feel more comfortable every day. Many homeowners look at DIY hydronic radiant floor heating systems before deciding how to install one. While doing the work yourself may seem like a good way to save money, a hydronic heating system needs careful planning and the right installation steps. Every part of the process helps the system work well for many years. Knowing how the installation works also helps you choose the best solution for your home. A professional installation also helps protect your investment because every part of the system is checked before it starts working. This gives homeowners confidence that their heating system will provide steady comfort for a long time.
A good heating system begins with a full home check. The installer looks at the size of each room, the type of floor, the insulation, and the number of windows and doors. This helps them understand how much heat each room needs. Every home is different, so the system should match the home instead of using the same design for every project. A proper plan helps every room stay warm without using more energy than needed. It also helps avoid future problems such as rooms that feel colder than others or equipment that works harder than necessary. A well-planned system creates better comfort from the first day of use.
After checking the home, the installer creates a heating plan. This shows where the pipes will go, where the manifold will be placed, and where the thermostats will control the heat. The layout is made to spread warmth across the floor as evenly as possible. Rooms that lose more heat may need the pipes placed closer together. A custom layout helps every part of the home feel comfortable. It also makes future maintenance easier because every part of the system has already been planned before the installation begins. Good planning reduces delays and helps the project move smoothly from start to finish.
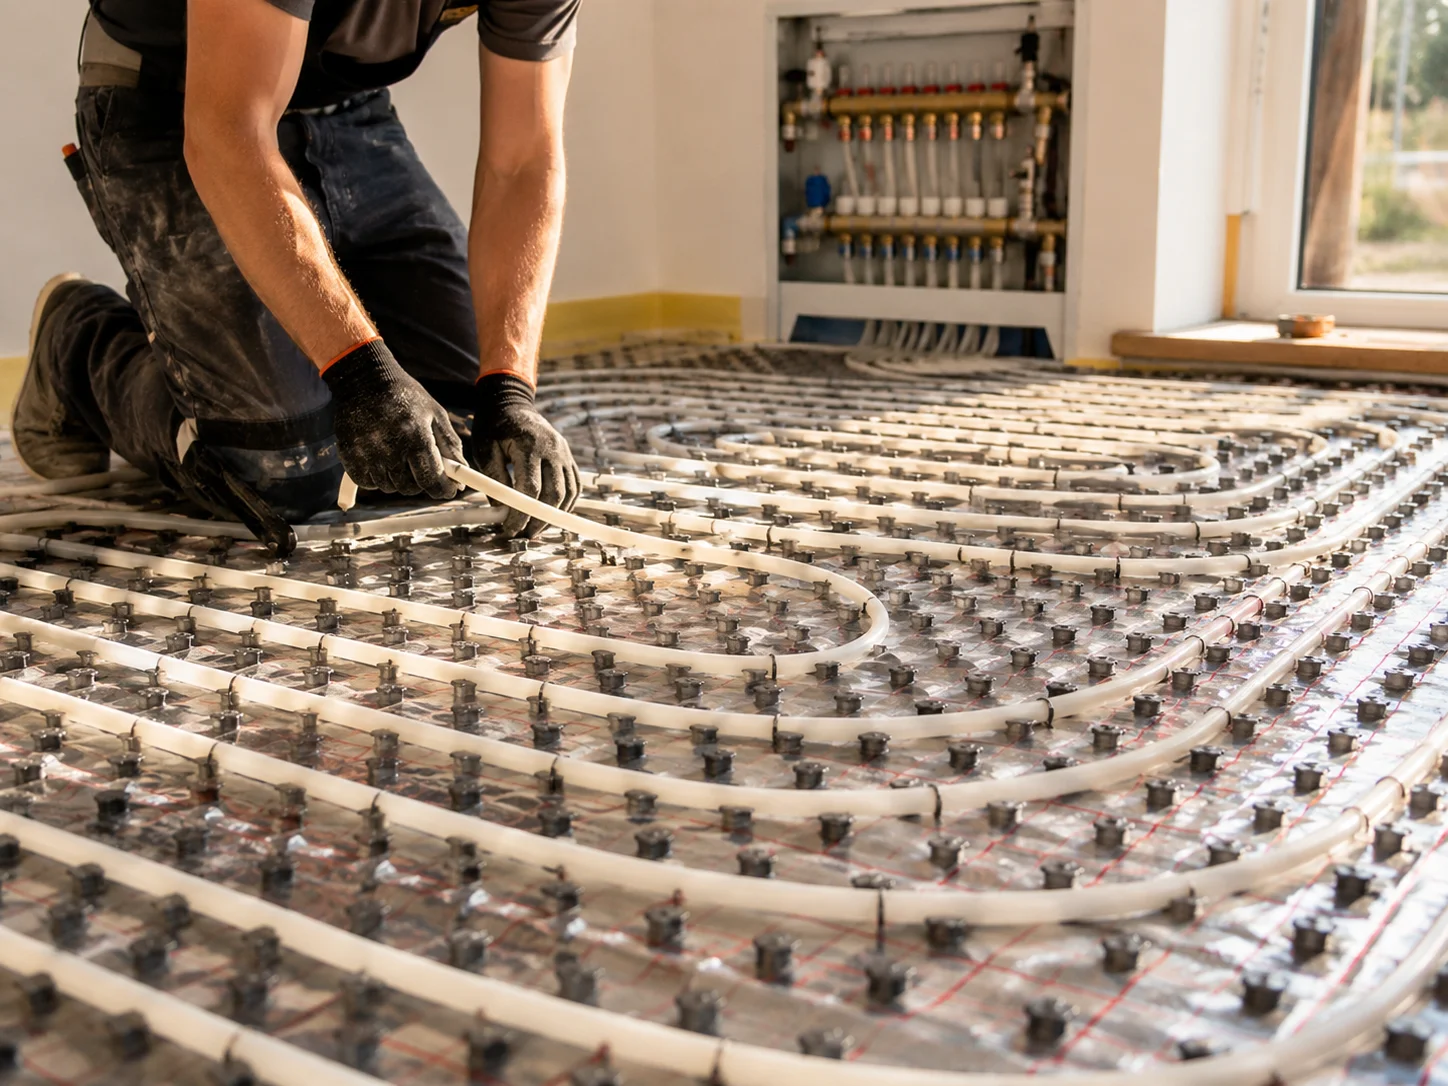
The floor must be ready before the heating pipes are installed. In a new home, the pipes are usually placed before the concrete is poured. In an older home, the floor may need some changes before the work starts. A layer of insulation is placed under the pipes. This helps push the heat upward into the room instead of letting it move down into the ground. This simple step helps the system work better. Preparing the floor also gives the pipes a strong and stable base, helping them stay in the correct position throughout the installation process.
The next step is placing the PEX pipes. These flexible pipes carry warm water through the floor and spread heat across the room. The installer follows the heating plan very carefully so the pipes stay the right distance apart. Each pipe is connected to a manifold that sends warm water to different areas of the home. Careful pipe placement helps stop cold spots and keeps every room at a steady temperature. Every connection is checked before moving to the next step because even a small mistake can affect the performance of the complete heating system.
Before the floor is covered, the installer tests the system. Water or air pressure is used to make sure every pipe and connection is working properly. This check helps find small problems before the floor is finished. Fixing a problem at this stage is much easier than repairing it after the flooring is complete. A full system check gives homeowners peace of mind. It also confirms that the heating system is ready for daily use before the final floor surface is installed.
After the pipes pass the test, the heating equipment is connected. This includes the boiler, pumps, control valves, thermostats, and the manifold. These parts work together to move warm water through the pipes and keep every room at the right temperature. Each heating zone can be controlled on its own, so different rooms can have different heat settings if needed. This gives homeowners better control over comfort while helping the system work smoothly throughout the home. Many homeowners who plan outdoor heating also compare DIY driveway snow melting systems with professional installation. Although a do it yourself setup may seem simple, snow melting systems need the right pipe layout, proper heat source, and correct water flow to perform well.
Once the heating system is ready, the final flooring is installed. Hydronic radiant floor heating works well under tile, concrete, engineered wood, and some vinyl flooring. The right flooring helps heat move into the room more easily. Choosing the correct floor material also helps the heating system perform at its best. A properly installed floor protects the heating system below while giving the home a clean and finished appearance that lasts for many years.
The last step is making sure the whole system works the way it should. The installer checks the water flow, the boiler, the thermostats, and every heating zone. Small changes are made if needed, so each room gets the right amount of heat. Homeowners are also shown how to use the controls and how to keep the system working well with regular maintenance. This final inspection confirms that every part is working together safely and correctly before the project is complete.
At Canadian In Floor Radiant Solutions Inc., our goal is to install heating systems that match your home, your comfort needs, and your budget. We carefully plan every project, complete every installation with attention to detail, and test the system before the work is finished. We also install outdoor heating solutions, including a driveway snowmelt system, to help keep driveways and walkways clear during winter. Our team is always ready to answer your questions and explain every step in simple language so you know exactly what to expect.
If you are planning a new home or upgrading your current heating system, contact Canadian In Floor Radiant Solutions Inc. today. Our team is ready to answer your questions, design the right system for your home, and provide a professional installation that delivers reliable comfort for years to come.
The installation time depends on the home's size, floor type, and project scope. Our team plans every stage carefully to complete the work efficiently without affecting quality.
Yes. Our team can install the system in many existing homes. The process depends on the current flooring, structure, and available space beneath the floor.
Tile, concrete, engineered wood, and selected vinyl flooring work well because they allow heat to move through the floor efficiently and provide consistent indoor comfort.
Yes. Regular inspections help keep the system working properly. Our team recommends routine servicing to check equipment, maintain performance, and extend the system's lifespan.
Professional installation provides accurate system design, proper testing, safe connections, and dependable performance. Our experienced team helps prevent costly mistakes and future repair issues.
Expert heating solutions for your home and business — from radiant floors to snow melting and pool heating systems.
Unit #2, 633 Enfield Rd, Burlington, Ontario L7T 2X9, Canada.


